- What Yoga Poses are good for Sciatica?
- What Position is Best for Sciatica Pain?
- How can I get Immediate relief from Sciatica?
What Yoga Poses are good for Sciatica?
Yoga is one of the best therapeutic approaches to strengthening and lengthening muscles. Try this simple 5 pose sciatica yoga sequence to help alleviate any discomfort you may be feeling from sciatic nerve damage.
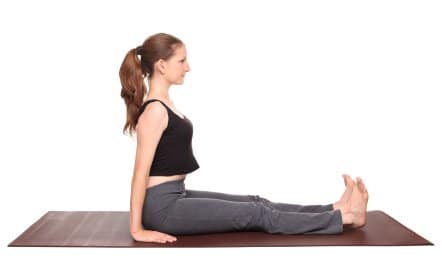
Staff Pose (Dandasana)

Staff pose is the foundation for most seated yoga poses. It strengthens the hip flexors, back and abdominal muscles while also stretching the shoulders and chest.
- Sit down on the ground with your legs together and extended straight out in front of you.
- Flex your feet and press your heels down, distributing your weight evenly across the inner and outer leg.
- Plant your palms beside your hips with your fingertips pointing toward your toes, and press into your hands to sit up tall.
- Gently draw your low ribs in and find a slight lift in your sternum, bringing your torso perpendicular to the floor.
- Lengthen all the way from your tailbone up and out through the crown of your head, and tuck your chin in slightly toward your chest.
- Remain in the pose anywhere from 5 to 10 breaths.
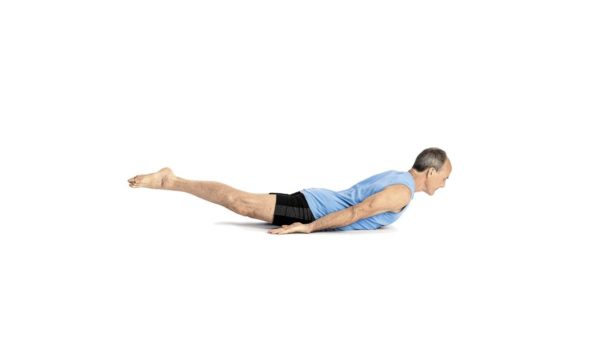
Locust Pose (Shalabbasana)
 Locust Pose is an intermediate backbend that tones and strengthens the entire back of the body.
- Begin lying on your stomach with your arms at your sides. Rest your forehead on the mat. Extend your legs straight behind you, hip-width apart.
- Inhale and raise your head to look forward. On your exhale, lift your chest and arms. Keep your arms alongside your body with your palms facing down. Reach your arms back toward your feet.
- Rest your weight on your lower ribs, belly, and front pelvis.
- Draw your shoulder blades into your back ribs and extend them away from each other.
- Keep your breath smooth and even.
- Hold for up to one minute.
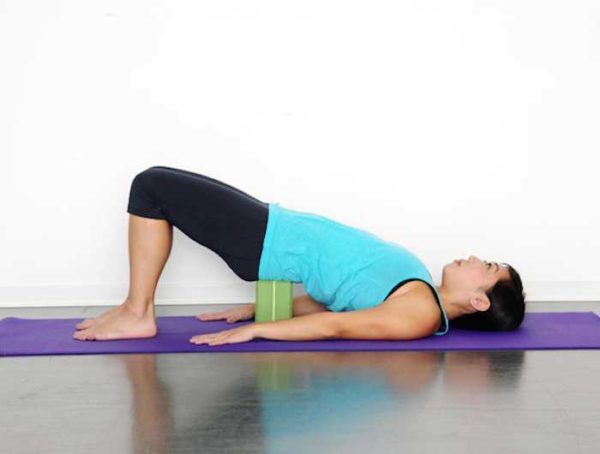
Supported Bridge Pose (Setu Bandasana)

A supported bridge is an easy way to relax while releasing your spine in some great new directions.
- Lie down on your back
- Plant your feet behind your hips, knees up.
- Lift your hips up to a comfortable level, and place a block or pillow under your sacrum.
- Remain in the pose anywhere from 5 to 10 breaths.
Reclining Big Toe Pose (Supta Pedangushasana)

This gentle hamstring stretch helps to open the hips and reduce low back pain. It also stretches the groins and calves, while strengthening the knees.
- Lie on your back with your legs extended and arms resting at your sides.
- Bend your right knee and hug your thigh to your chest. Keep your left leg extended along the floor. Wrap a belt, strap or towel around the ball of your right foot and grasp one end of the belt, strap or towel in each hand.
- Slowly straighten your leg, extending your heel to the ceiling. Keep your right foot flexed and lift through the ball of your right big toe.
- Draw slightly down on the strap. Feel your lower back press into the ground.
- Press your shoulder blades lightly into the floor and broaden across your collarbones. Lengthen the back of your neck. Relax the muscles of your buttocks on the floor.
- Softly gaze at your right big toe or at a single spot on the ceiling if you can’t see your toe.
- Hold for 1-3 minutes.
- Exhale as you draw your knee into your chest and let go of the strap. Then, release your leg completely and extend it along the floor.
- Repeat on the opposite side for the same length of time.
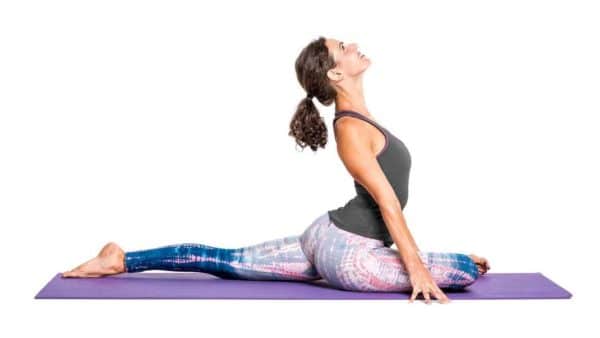
Pigeon Pose (Kapotasana)

Pigeon Pose is a hip opener, it stretches and flexes the hip.
- Begin in downward dog by brining your knees should below your hips on the mat. Your hands should be slightly ahead of your shoulders
- Raise your right leg so it extends away from you. Slide it forward to the back of your right wrist. Angle your right shin under your torso and bring your right foot to the front of your left knee, behind your left hand.
- Slide your left leg back behind you. Straighten it and let the front of your thigh sit on the floor. Look behind you to make sure your left leg is extended straight behind you, not out to one side.
- Lower the outside of your right buttock to the floor. Position your right heel so it is in front of your left hip.
- Place your hands on either side of your leg. Inhale and rise up on your fingertips. Try to elongate your spine. Lengthen your lower back by pressing your tailbone down and forward.
- Exhale and lay your torso down over your right leg.
- Hold this pose for 4-5 breaths. Inhale and exhale deeply through your nose.
- Repeat on the opposite side.
What position is best for Sciatica pain?
If you’re looking for relief beyond your yoga sequence, try lying flat on your back. Ground down through your heels and hips, letting them remain flat on the floor or your bed. Put a slight bend under your knees and slide a pillow underneath for support. Continue to add pillows until you find a knee position that feels comfortable. It may take a few days of using this position to find relief.
How can I get immediate relief from Sciatica?
If you need immediate relief, alternating thermal and cooling therapies can help. Using ice to cool the area helps to reduce inflammation. Using heat in between encourages circulation of blood to the painful area, which, in turn, speeds healing. The alternating temperatures will also help to ease muscle spasms that can sometimes accompany sciatica pain.
If you’re suffering from sciatica pain and would like a customized treatment program, get in touch!

